QuoteMaster Documentation
Complete guide to setting up and using QuoteMaster in your Google Workspace™
Quick Navigation
Getting Started
QuoteMaster is a Google Workspace™ add-on that helps tradespeople create professional quotes and invoices directly from Google Sheets™. It integrates with Google Forms™, Drive™, Calendar™, and your email client to provide a complete business management solution.
Before you begin, you'll need:
- A Google™ account with access to Google Sheets™, Forms™, and Drive™
- Basic familiarity with Google Sheets™
- Your business details (logo, contact information, etc.)
Already using spreadsheets for your business?
If you're already managing your business with Excel or Google Sheets™, you can save time by importing your existing data into QuoteMaster:
- Client lists can be imported directly into the Client Database
- Service catalogs can be transferred to the Service Database
- Product inventories and materials lists can populate your Product Database
Many tradespeople start with basic spreadsheets but quickly outgrow them. QuoteMaster builds on what you already have, adding automation and professional features while keeping the familiar spreadsheet interface you're comfortable with.
Installation
Step 1: Install the QuoteMaster Add-On
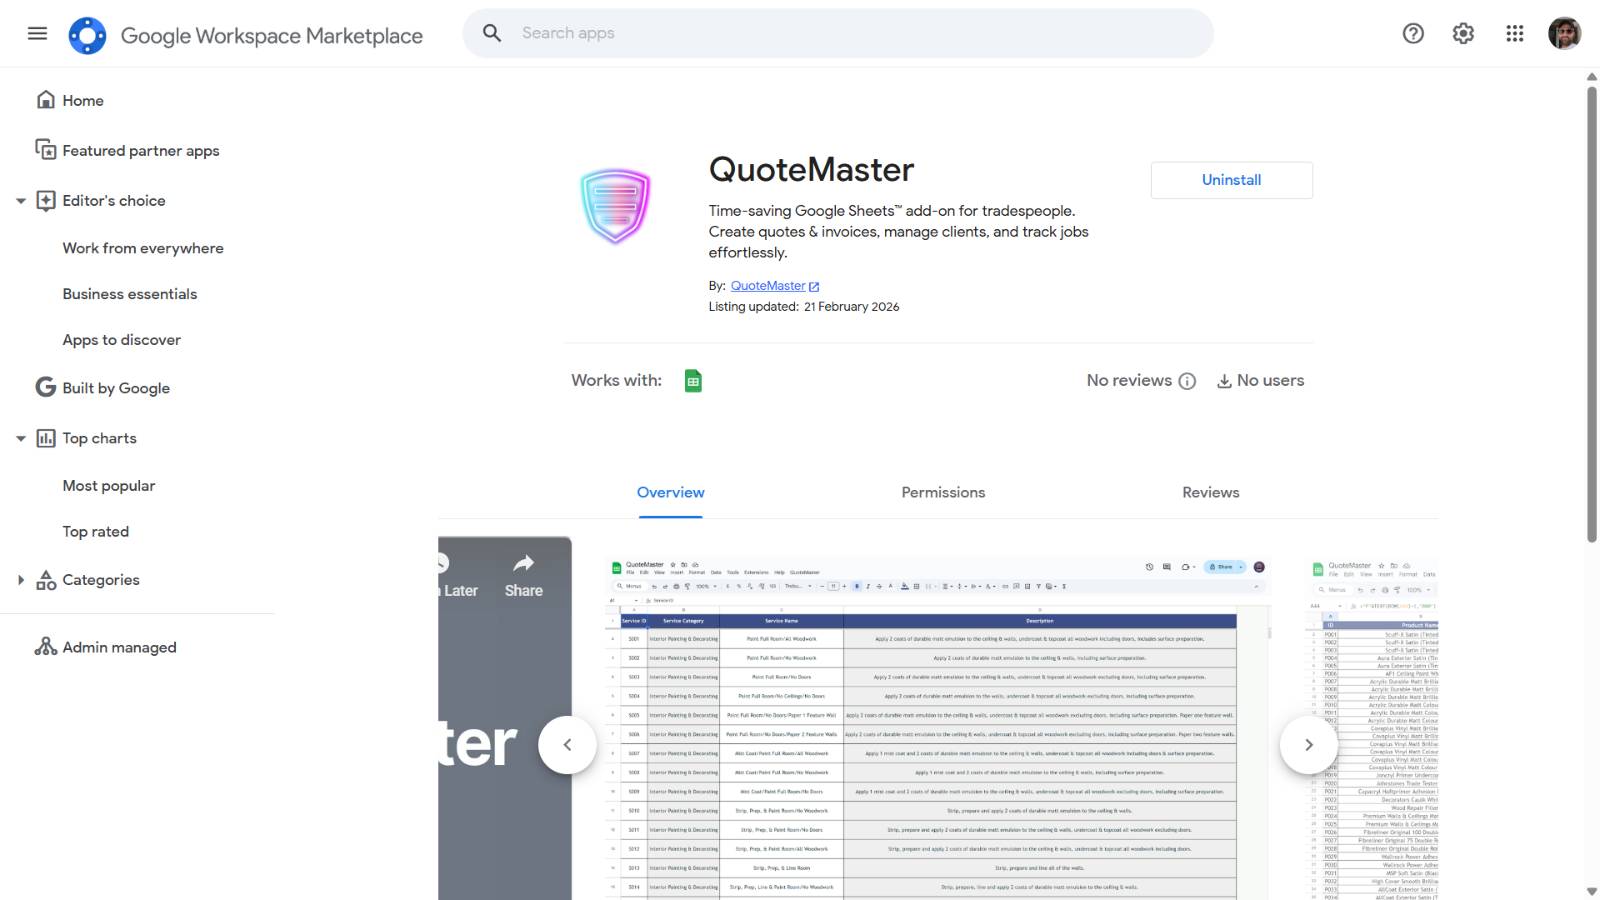
Start by installing the QuoteMaster add-on from the Google Workspace Marketplace™.

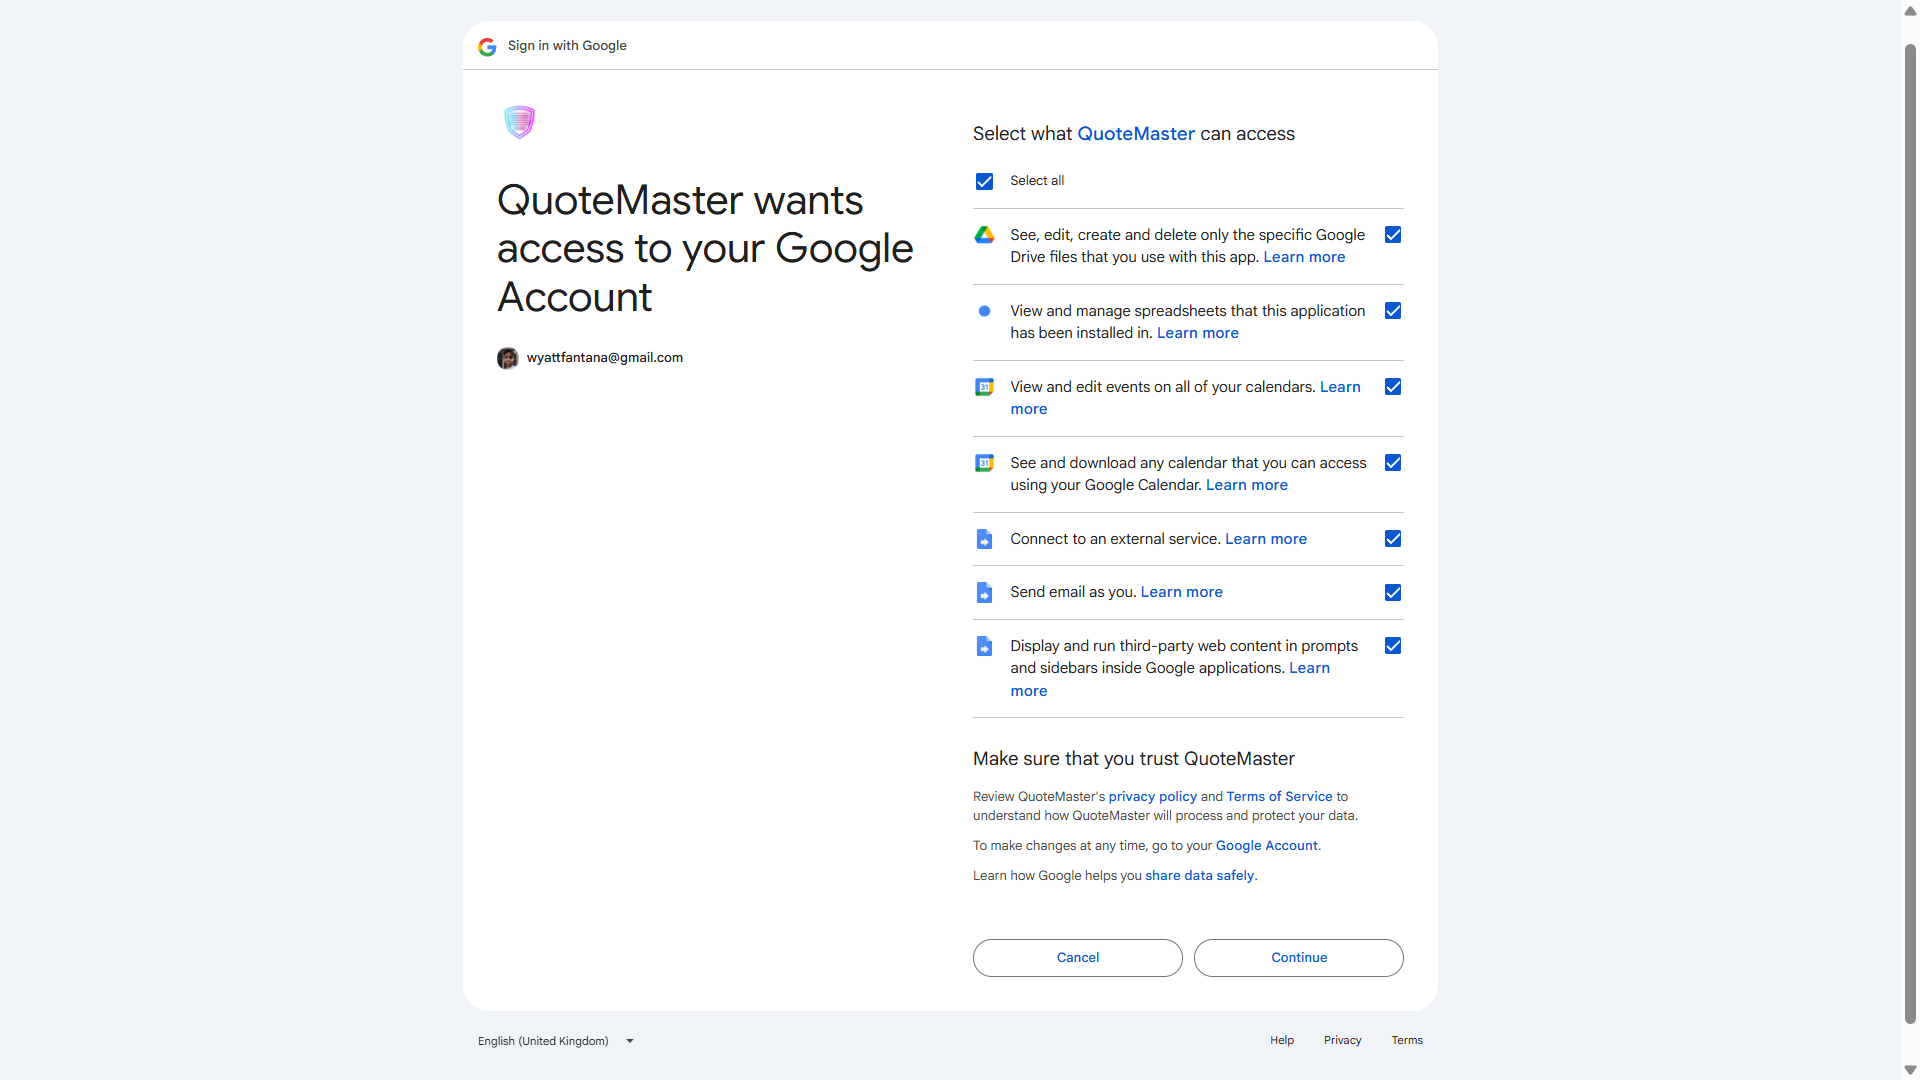
Step 2: Authorise the Add-On
When you first run QuoteMaster, Google will ask you to grant access to a few services. Simply click "Allow" to continue. QuoteMaster only ever accesses what it creates or what you explicitly action.
Step 3: Create Your QuoteMaster Workspace
QuoteMaster lives inside a Google Sheet™ that you set up yourself. Follow these steps to get it ready.
-
1
Create a new Google Sheet™
Open Google Sheets™ and create a blank spreadsheet. This will become your QuoteMaster workspace.
-
2
Give it a meaningful name
Rename the spreadsheet to something you'll recognise, for example Smith Plumbing - QuoteMaster. This keeps it easy to find in your Drive™.
-
3
Open the QuoteMaster menu
In the top menu bar, click Extensions then select QuoteMaster.
-
4
Generate your sheets
Select any option from the QuoteMaster menu. QuoteMaster will automatically generate all the tabs and structure you need. This only takes a few seconds.
You can regenerate your sheets at any time via Sheet Installer in the Settings tab, useful if anything ever gets accidentally deleted or needs a reset.
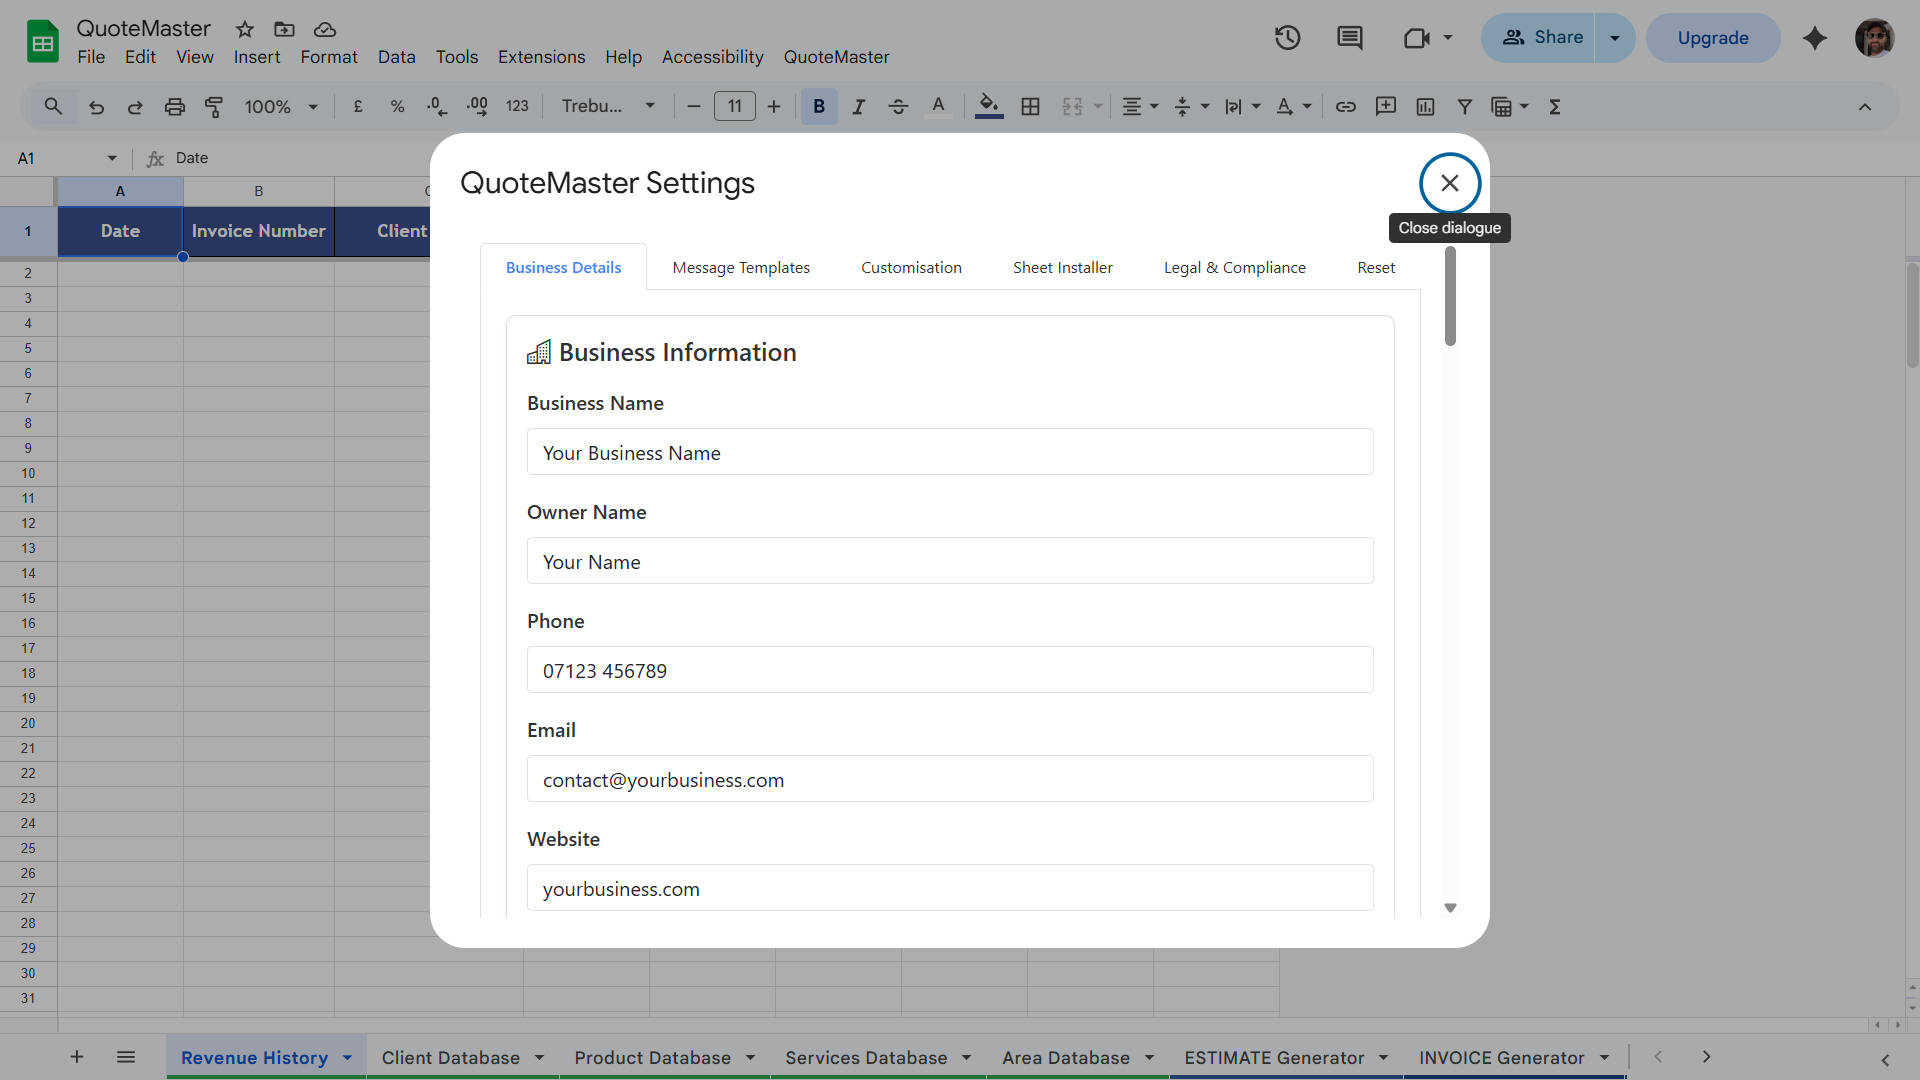
Business Configuration
Before adding clients and creating quotes, you'll need to set up your business details and preferences. This information will appear on all your estimates, invoices, and communications.
Business Settings
Add your business name, details, contact details, and payment details in the "Settings" tab. You will also need to add your logo in the "Customisation" tab, and customise your estimate and invoice templates in the "Message Templates" tab, for automated WhatsApp and email messages.
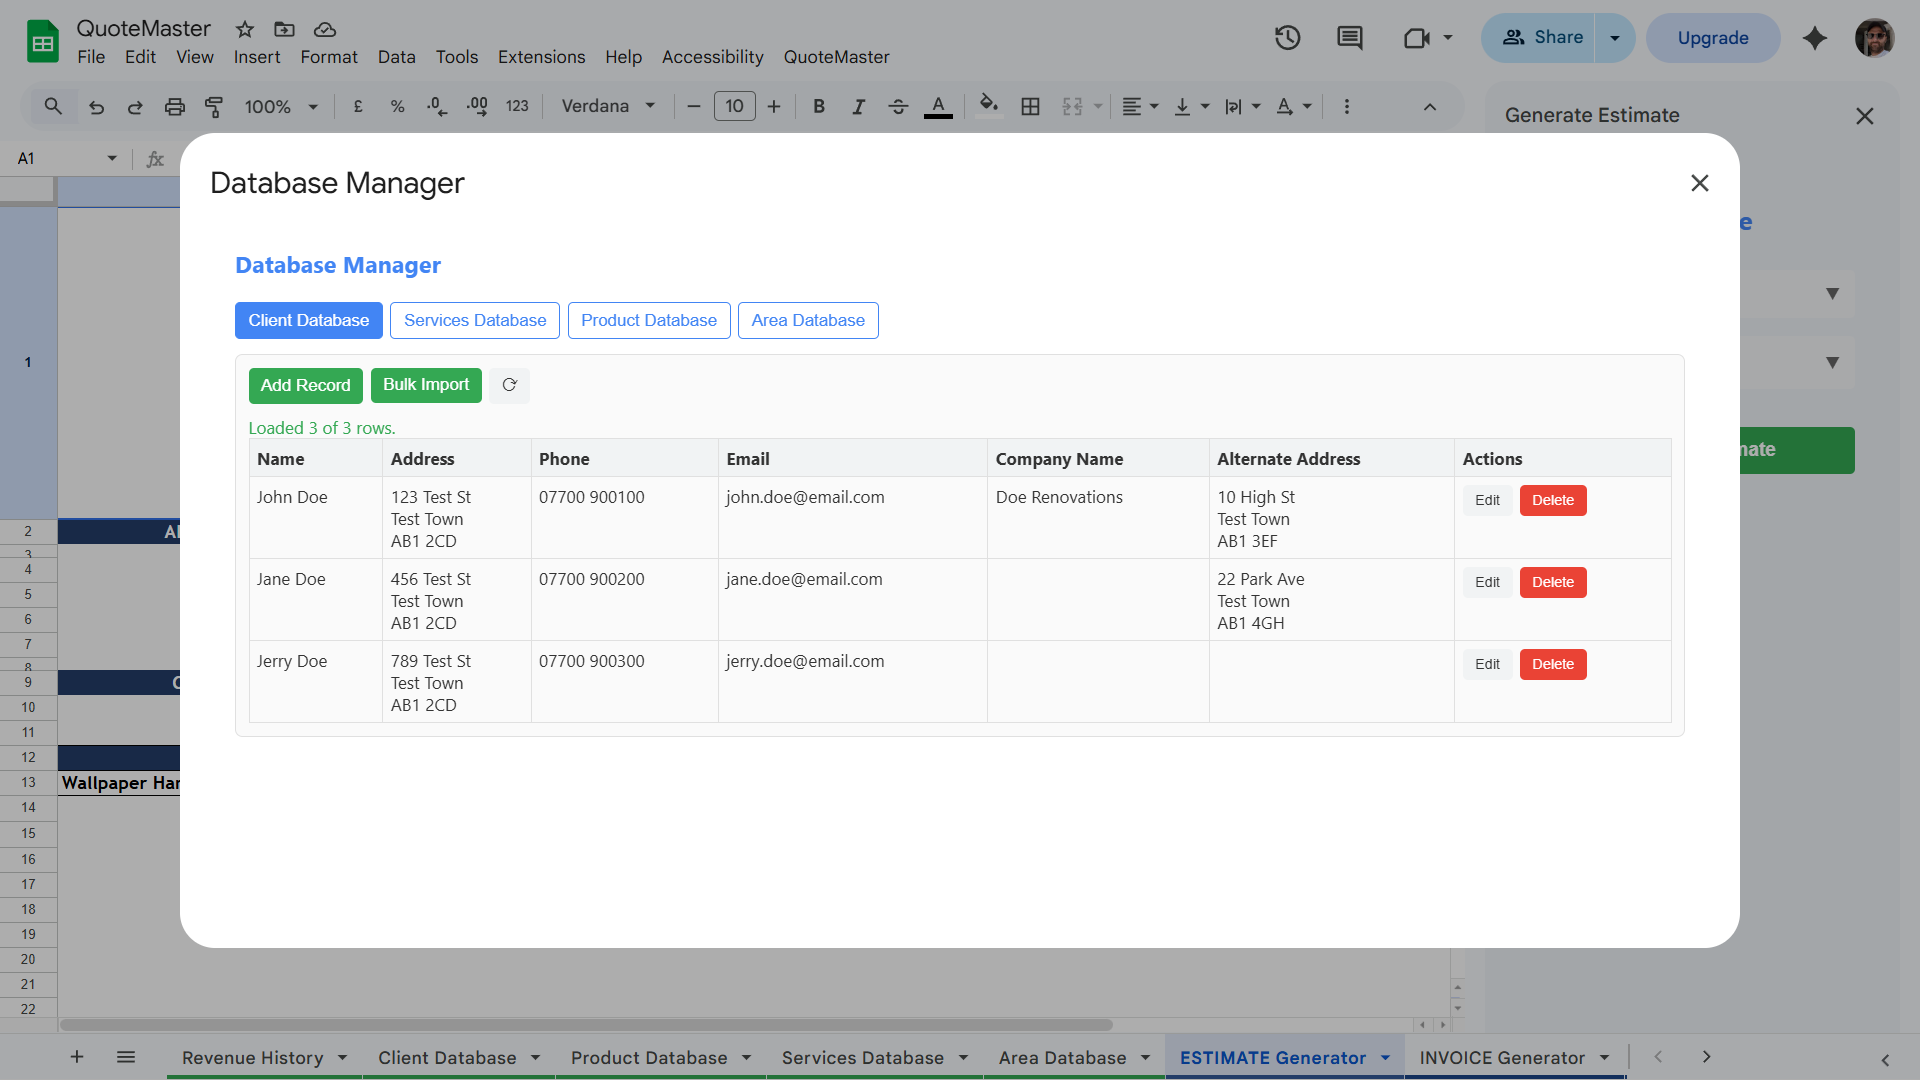
Database Manager
The Database Manager is your central hub for managing all the data QuoteMaster uses: clients, services, products, and areas. Access it via the QuoteMaster menu in Extensions. Each database can be managed individually, and all support manual entry, inline editing, and bulk import.
The Four Databases
Clients
Stores all your customer information. Client details are automatically pulled through when creating quotes and invoices: name, address, phone, email, and company name where applicable.
Address format
Enter addresses with proper line breaks so they display correctly on estimates and invoices:
London
SW1A 1AA
Services
Contains all the services you offer. When building a quote, you select from this list, so the more complete it is, the faster your quoting becomes.
Products
Stores your materials and products with automatic markup calculations. Only edit the Product Name, Brand, Base Price, and Category columns. The remaining columns contain formulas that calculate your markup and final prices automatically. Set your markup percentage in the Settings tab.
Areas
Define the locations you work in. Areas appear as a dropdown when building a quote and can be used for location-specific pricing.
Adding Records
Use the Add Record button within each database to add a new entry via a form. Fields will match the columns for that database.
Bulk Import
Each database supports bulk import for quickly loading large amounts of data. Use the Bulk Import button and paste in CSV or tab-separated data.
• Columns must match the current database column order
• Tick First row is headers if your pasted data includes a header row
• Click Import Rows to load the data
Creating Estimates and Invoices
Learn how to quickly generate professional estimates and invoices using the generator sheets.
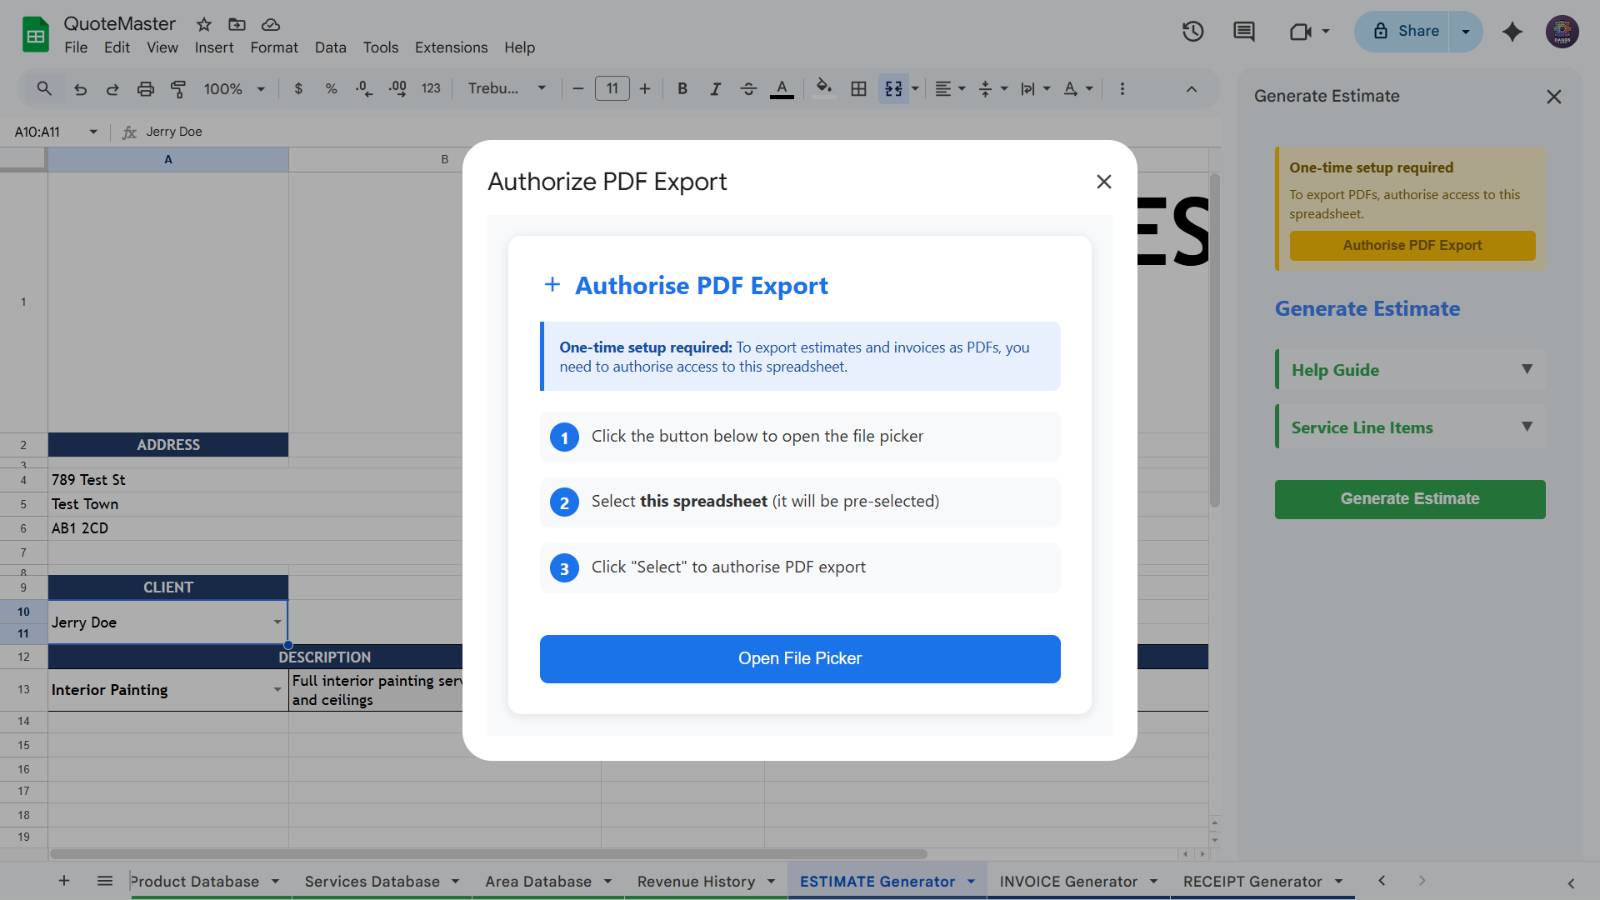
1. Authorise PDF Access
Before generating your first PDF, QuoteMaster needs one-time permission to save files to your Drive™. You'll be prompted to select a folder using Google's file picker. This is a security requirement. You only need to do this once.

2. Navigate To The ESTIMATE Generator Sheet and Select Client
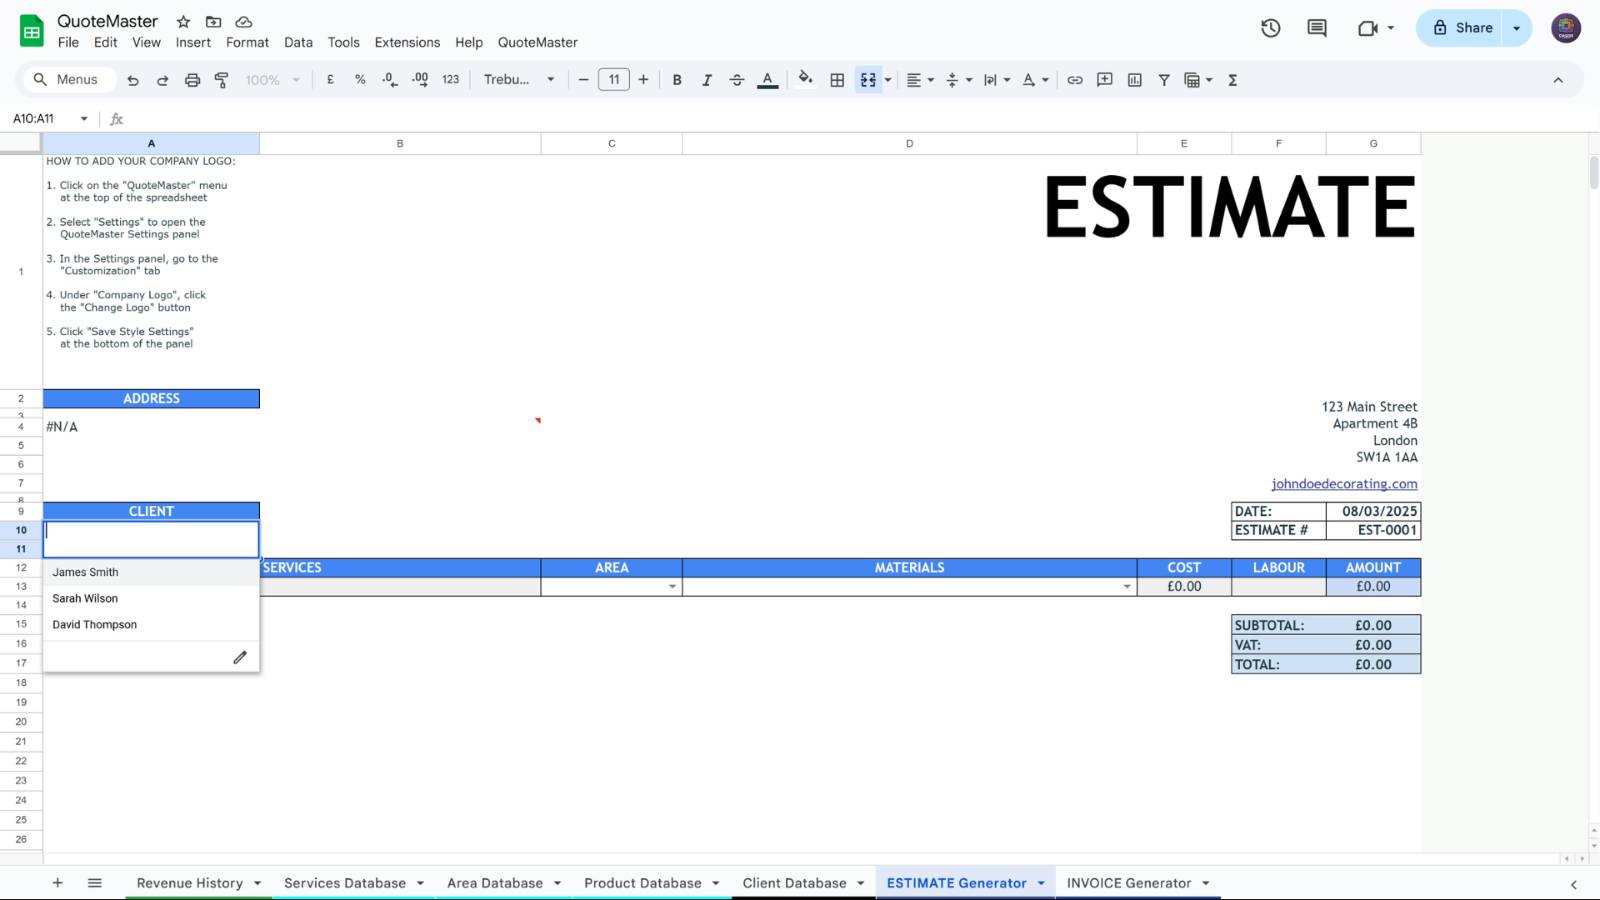
Choose an existing client or add a new one to the Client Database so it appears in the client dropdown menu
3. Select Service
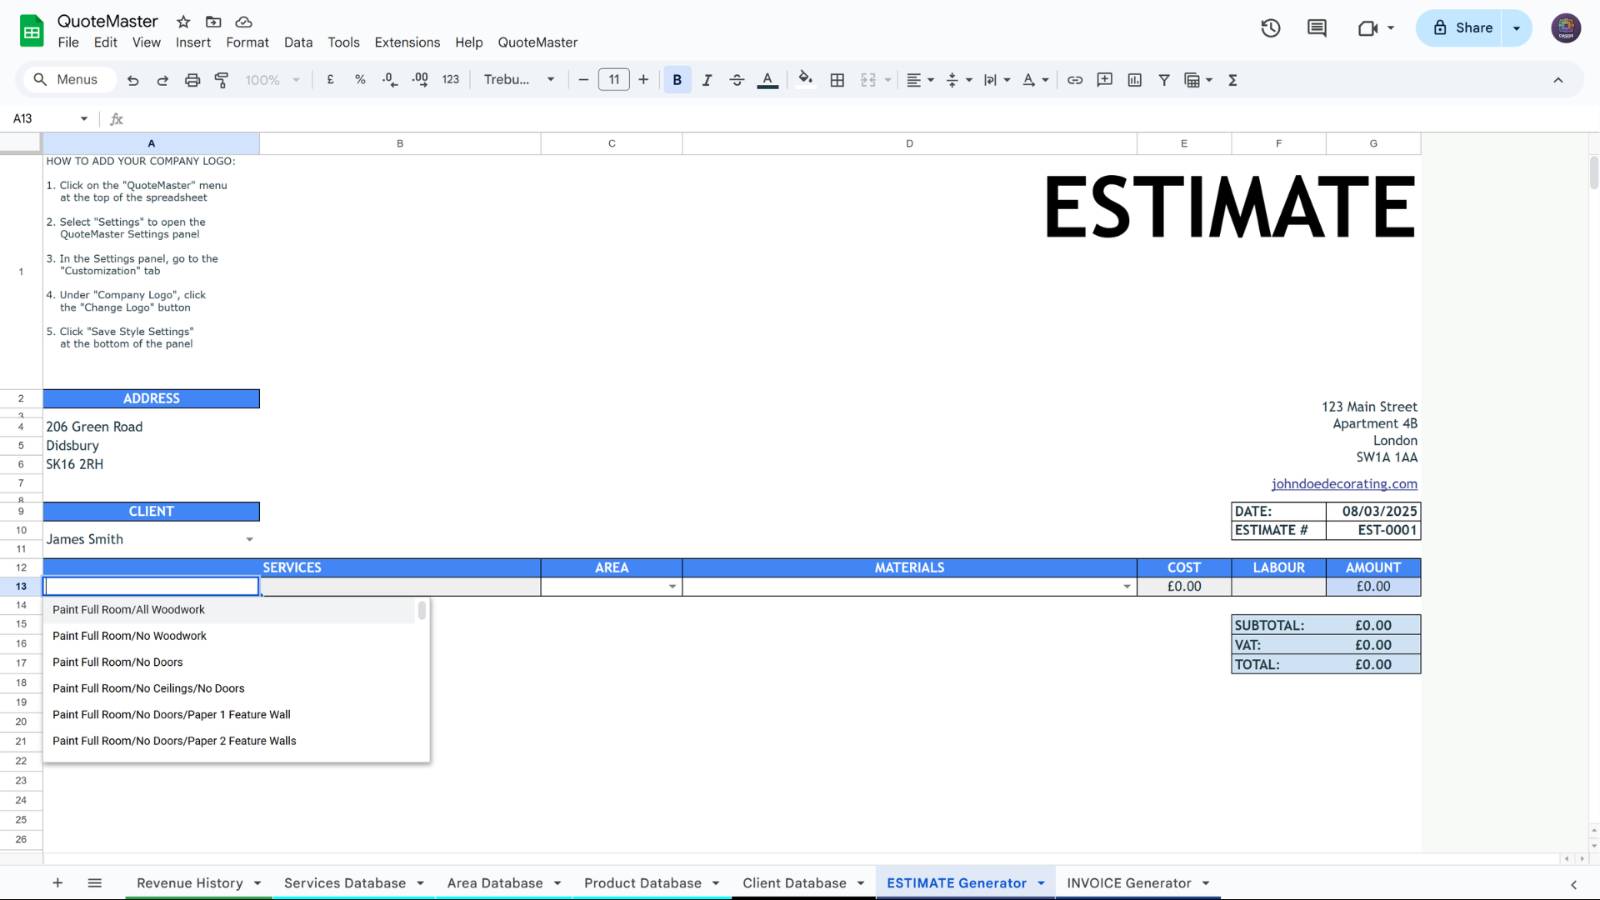
Select a service from the dropdown menu, or add a new service to the Service Database so it appears in the service dropdown menu
4. Select Area
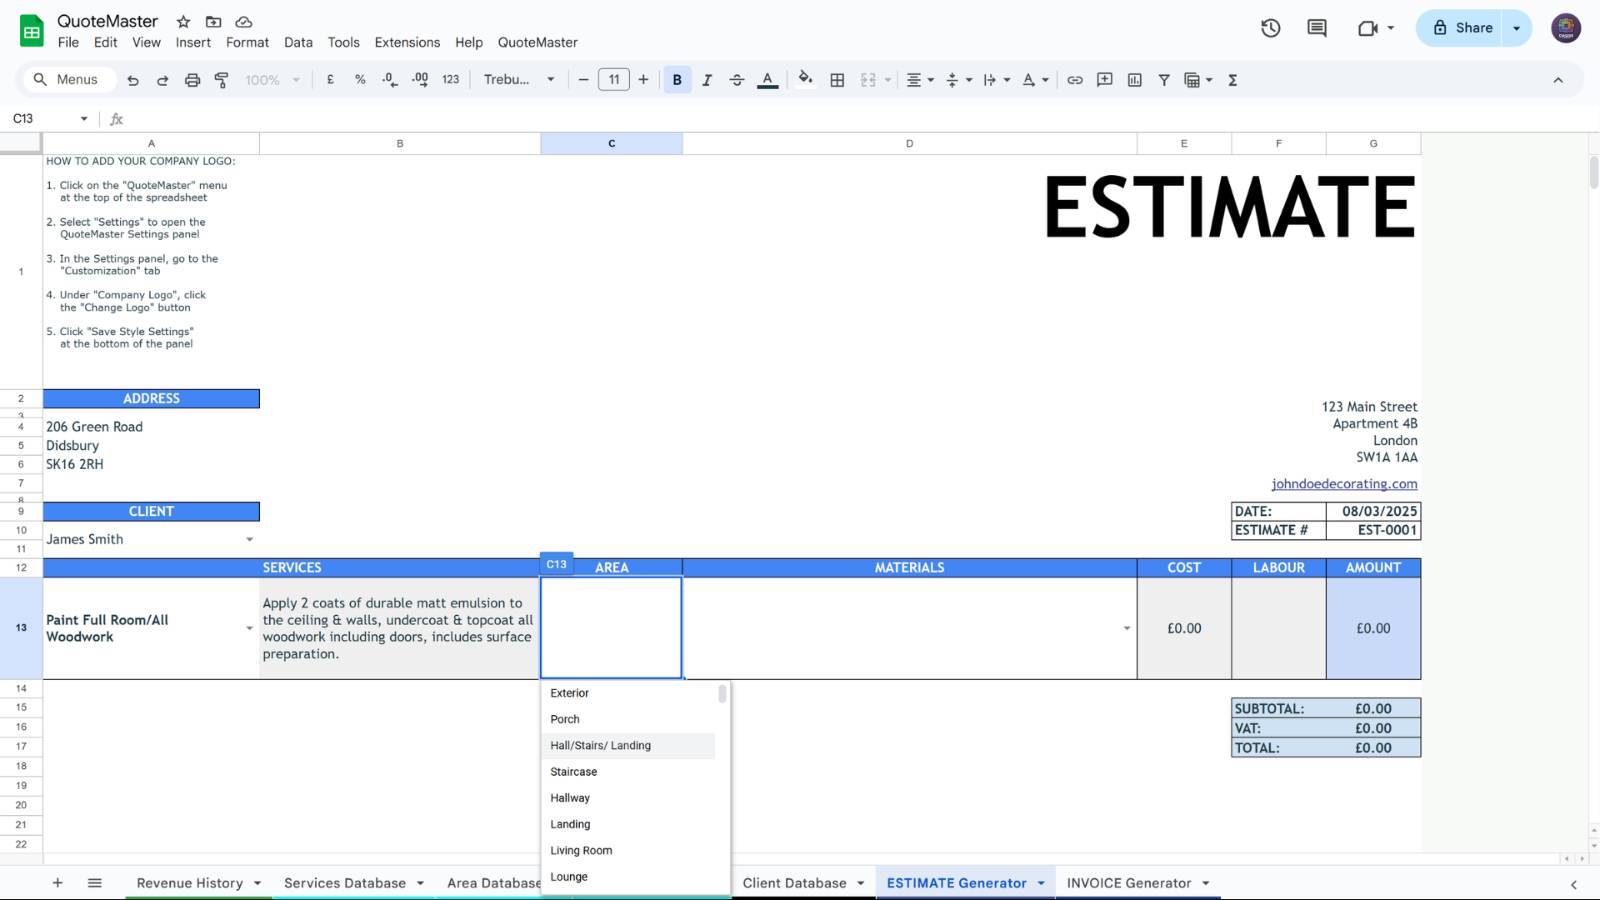
Select the area where the service will be carried out from the dropdown menu, or add a new area to the Area Database so it appears in the area dropdown menu
5. Add Materials
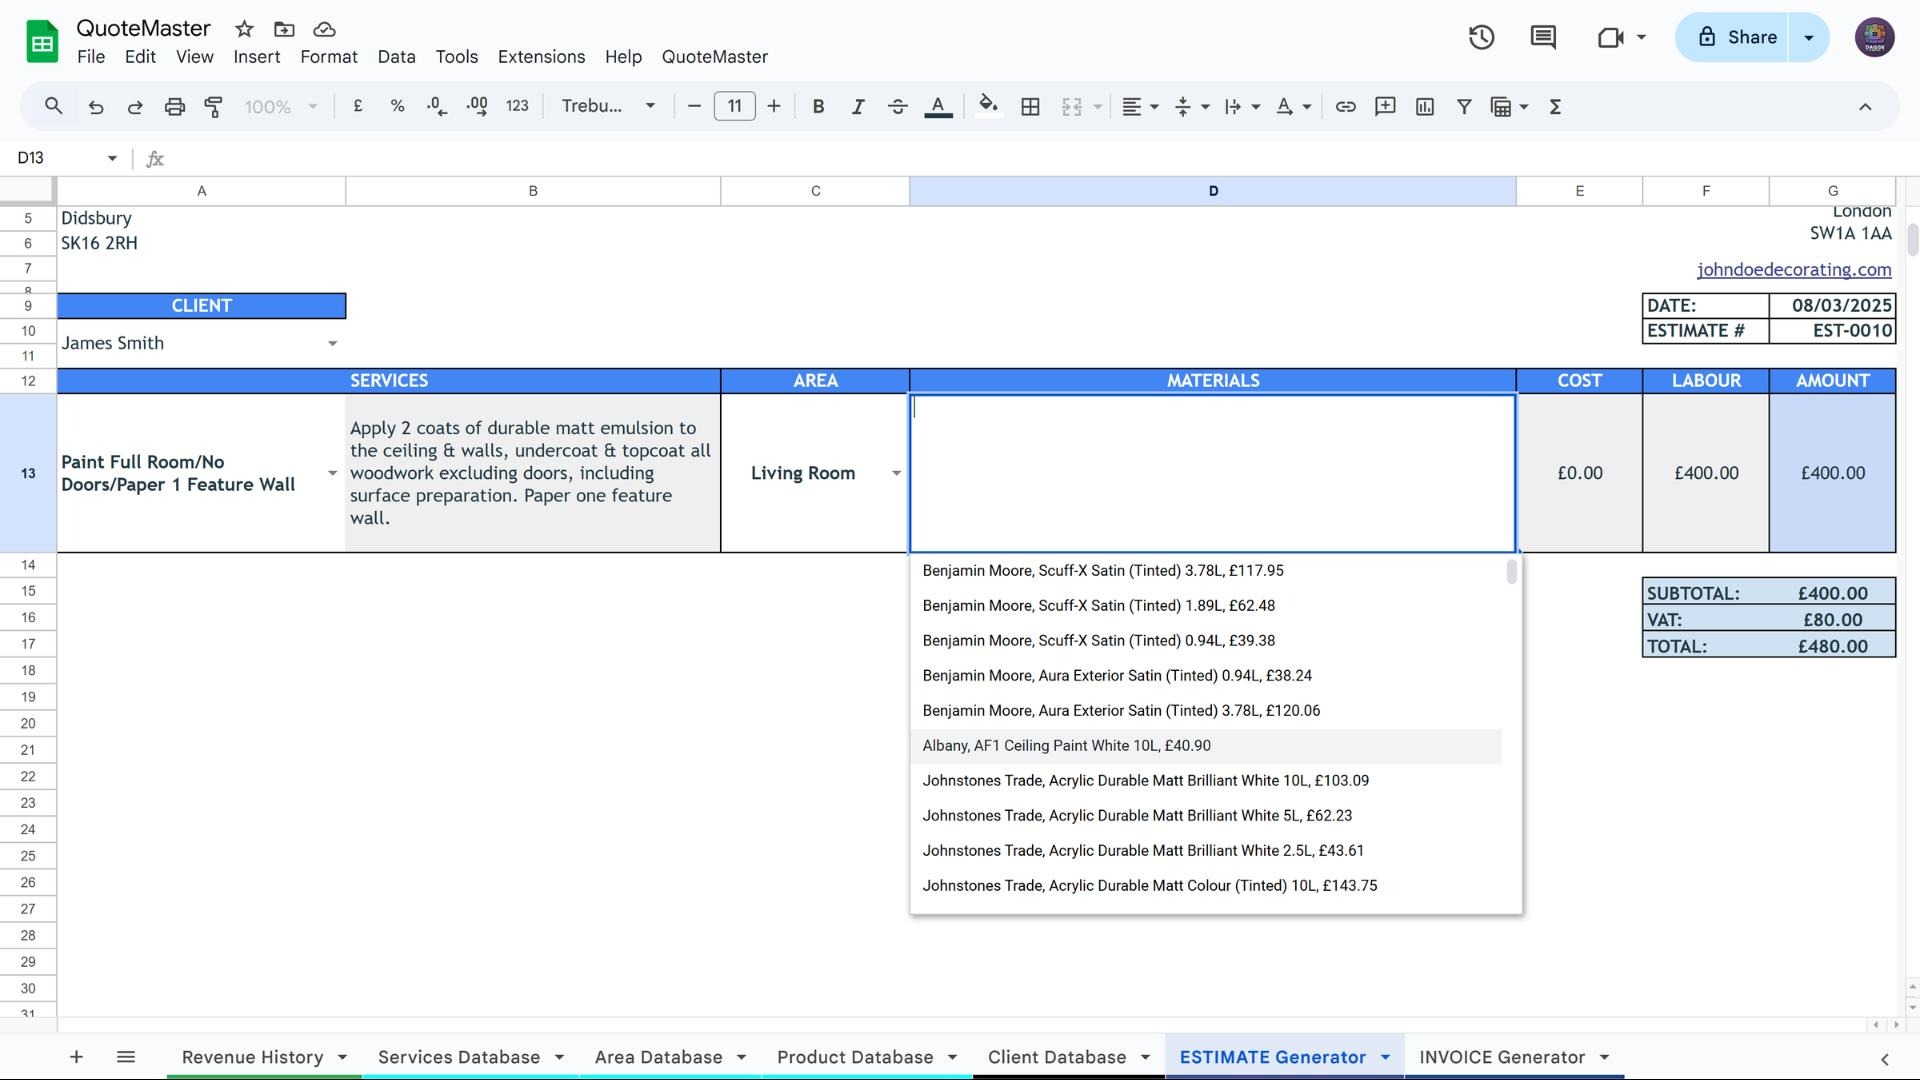
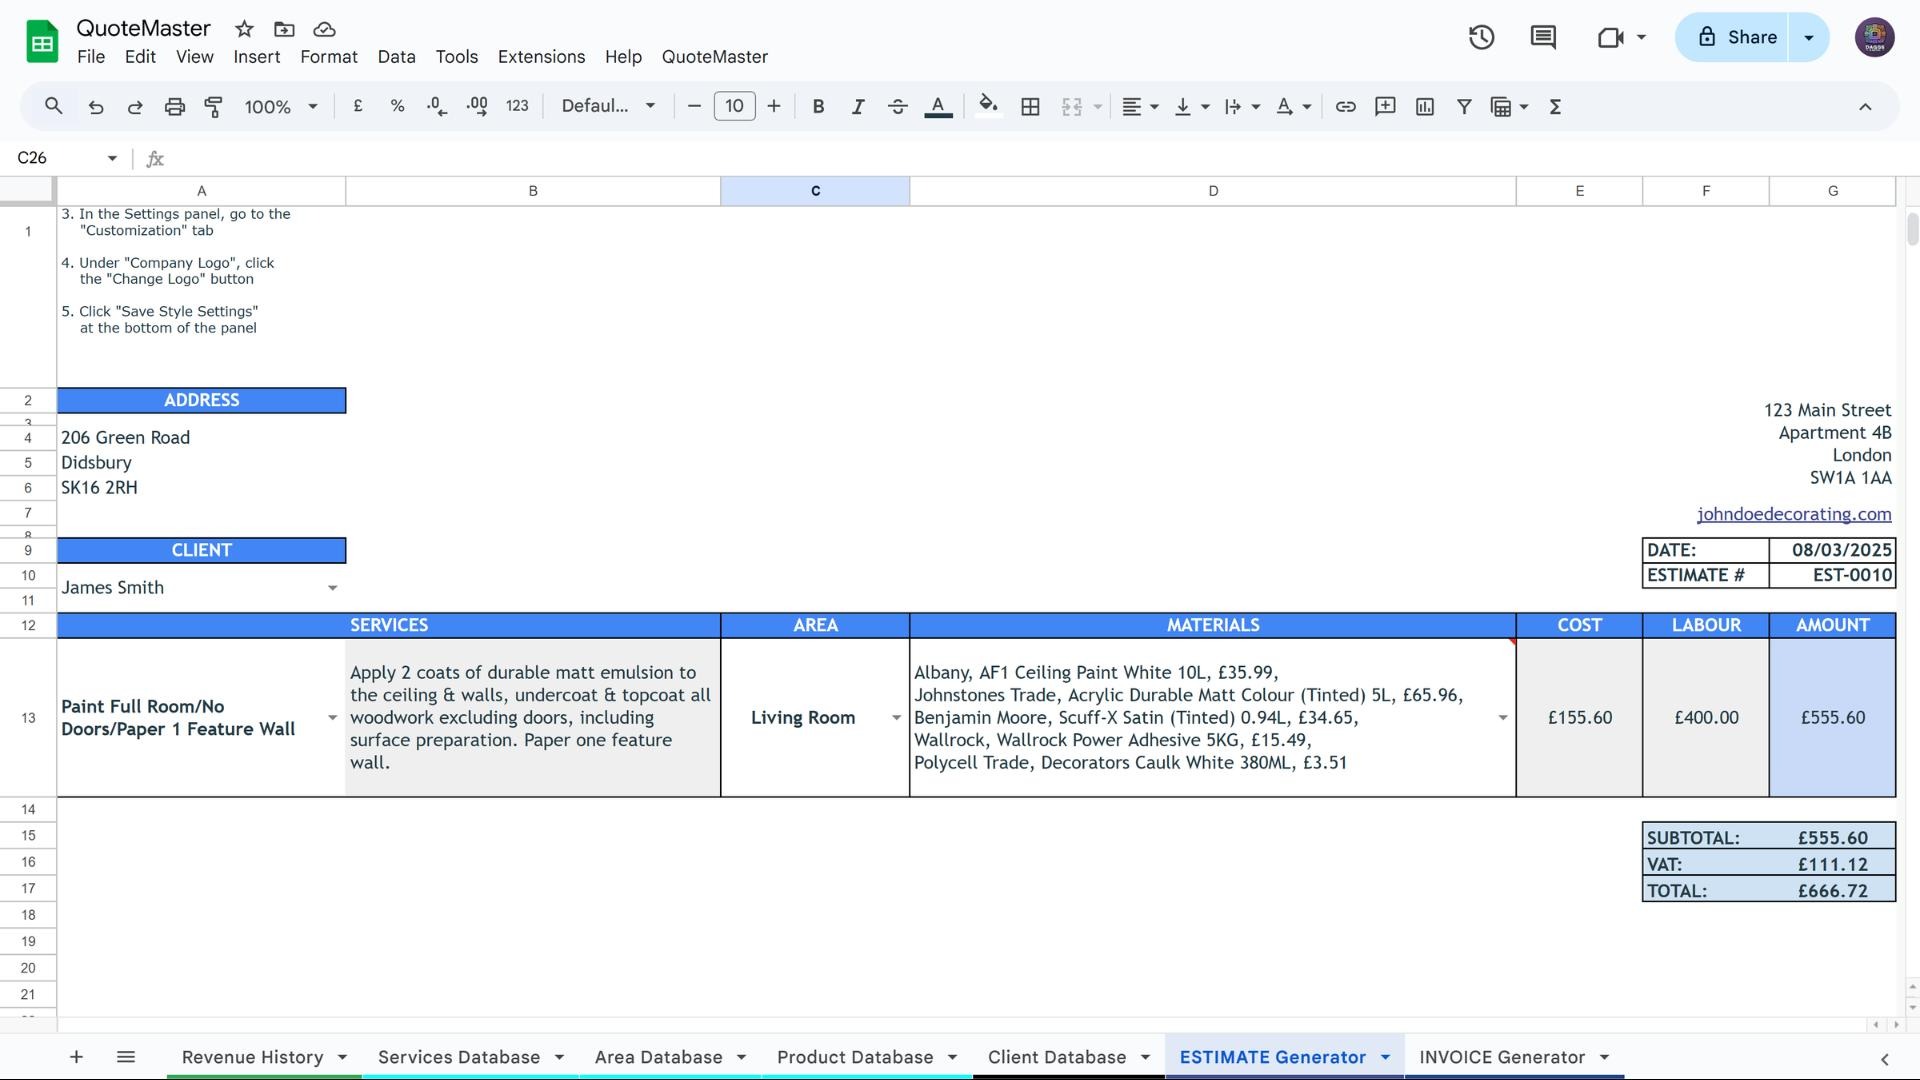
Select your materials from the dropdown menu in the ESTIMATE and INVOICE generators, they will be listed in the same order as they are listed in the Product Database. The material costs will be automatically calculated and added to your labour costs.
6. Manage Service Rows

Need more than one service on a quote? No problem. Use the sidebar to add, remove, or duplicate service rows instantly. You can also edit any of the details directly in the sheet itself, such as adjusting quantities, prices, or descriptions, giving you full flexibility over how each line item appears on your estimate.
7. Generate Estimate
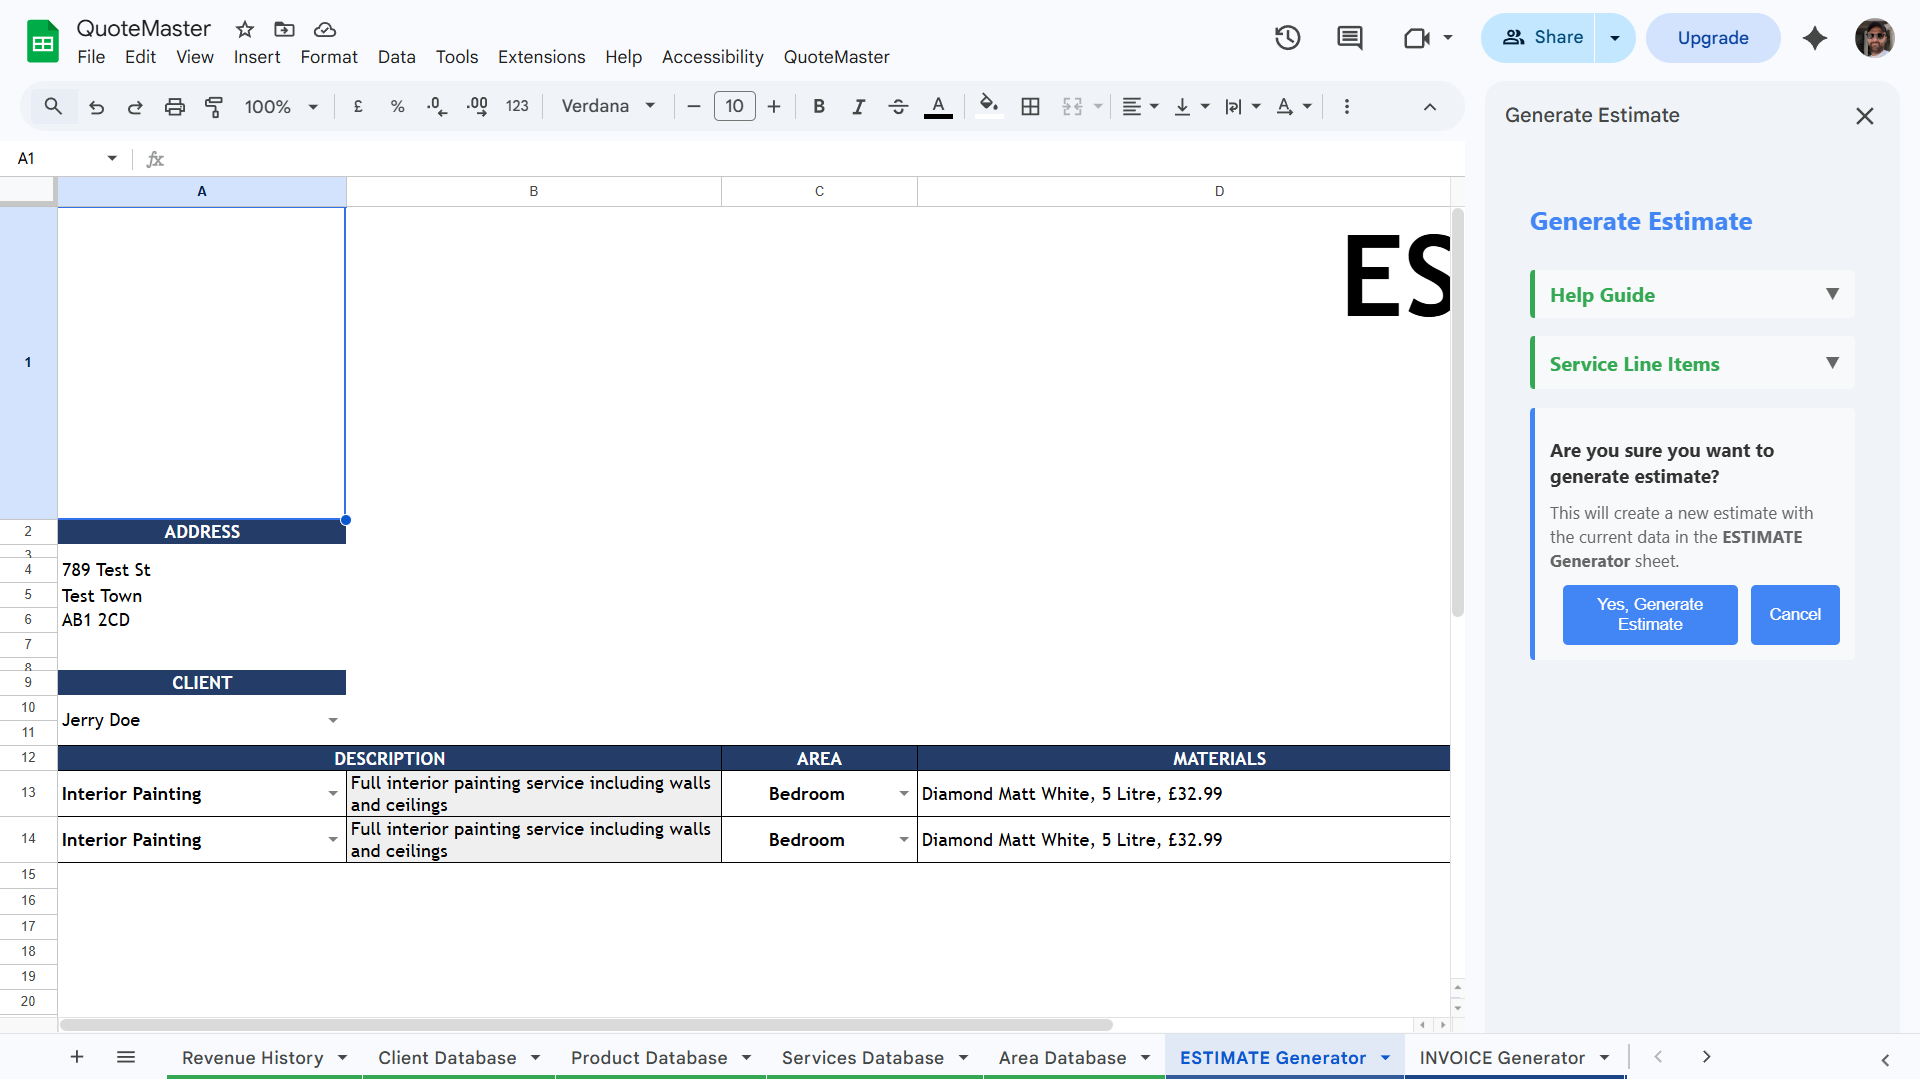
Select Generate Estimate from the QuoteMaster tab, then click the Generate Estimate button from the sidebar
8. Send to Client and Update Your Schedule
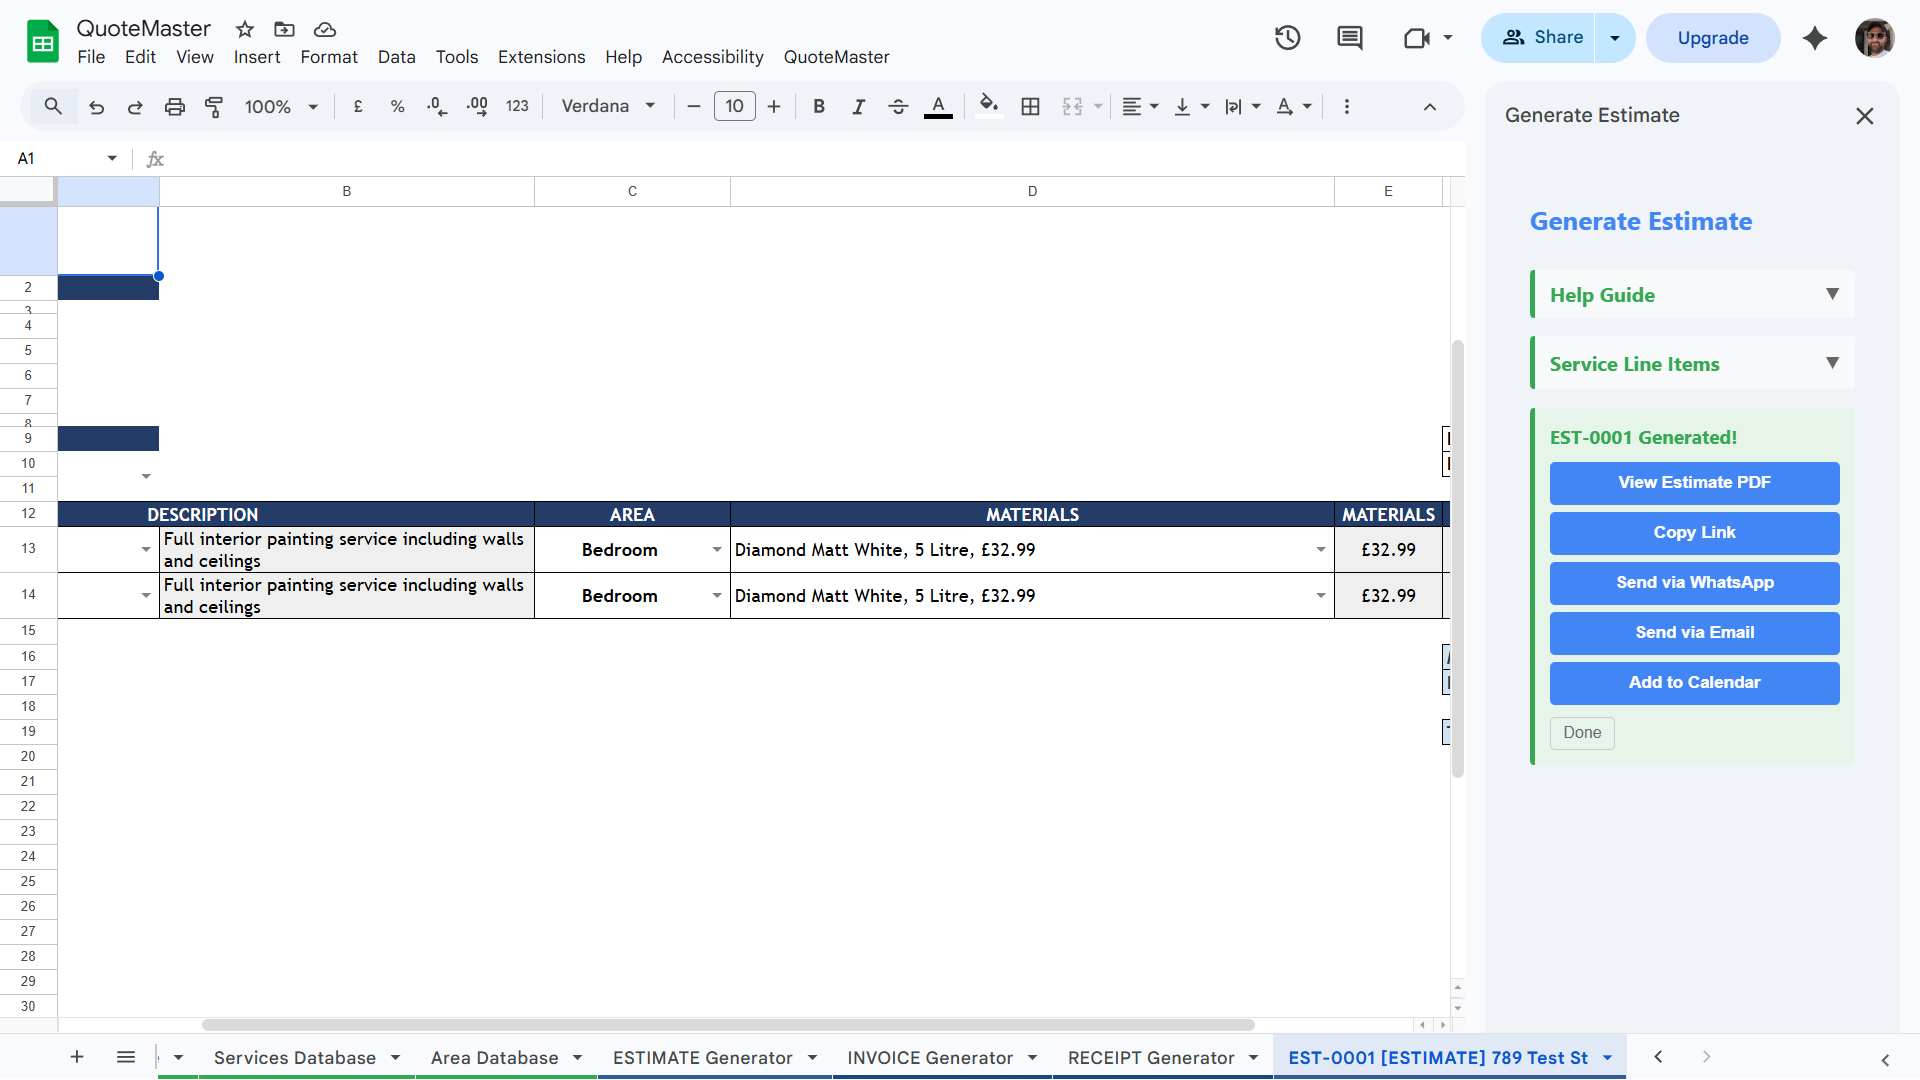
Once your estimate is generated, everything you need is right there in the sidebar. Send it to your client via WhatsApp or email with a single click, copy a shareable link, or open the PDF to view it yourself before it goes out. All three options are always available, so you can choose whatever works best for the job.
The sidebar also lets you add the job straight to your Google Calendar™ with everything built into the entry. Open it on your phone on the morning of the job and it's all there: the client's address with one-tap navigation, job details, and a link to the estimate document so there's no hunting through paperwork or trying to remember what was agreed. Every job is organised before you even leave the house.
9. Invoice Generator

The Invoice Generator works in much the same way as the Estimate Generator. Select the estimate you want to invoice from the list, make any edits you need before it's finalised, then generate. Once the invoice is ready, you have all the same send options as before: WhatsApp, email, or a shareable link.

There's one extra option once the invoice is generated: you can send a review request directly to your client. A great way to build up your reputation without any extra legwork.
10. Receipts
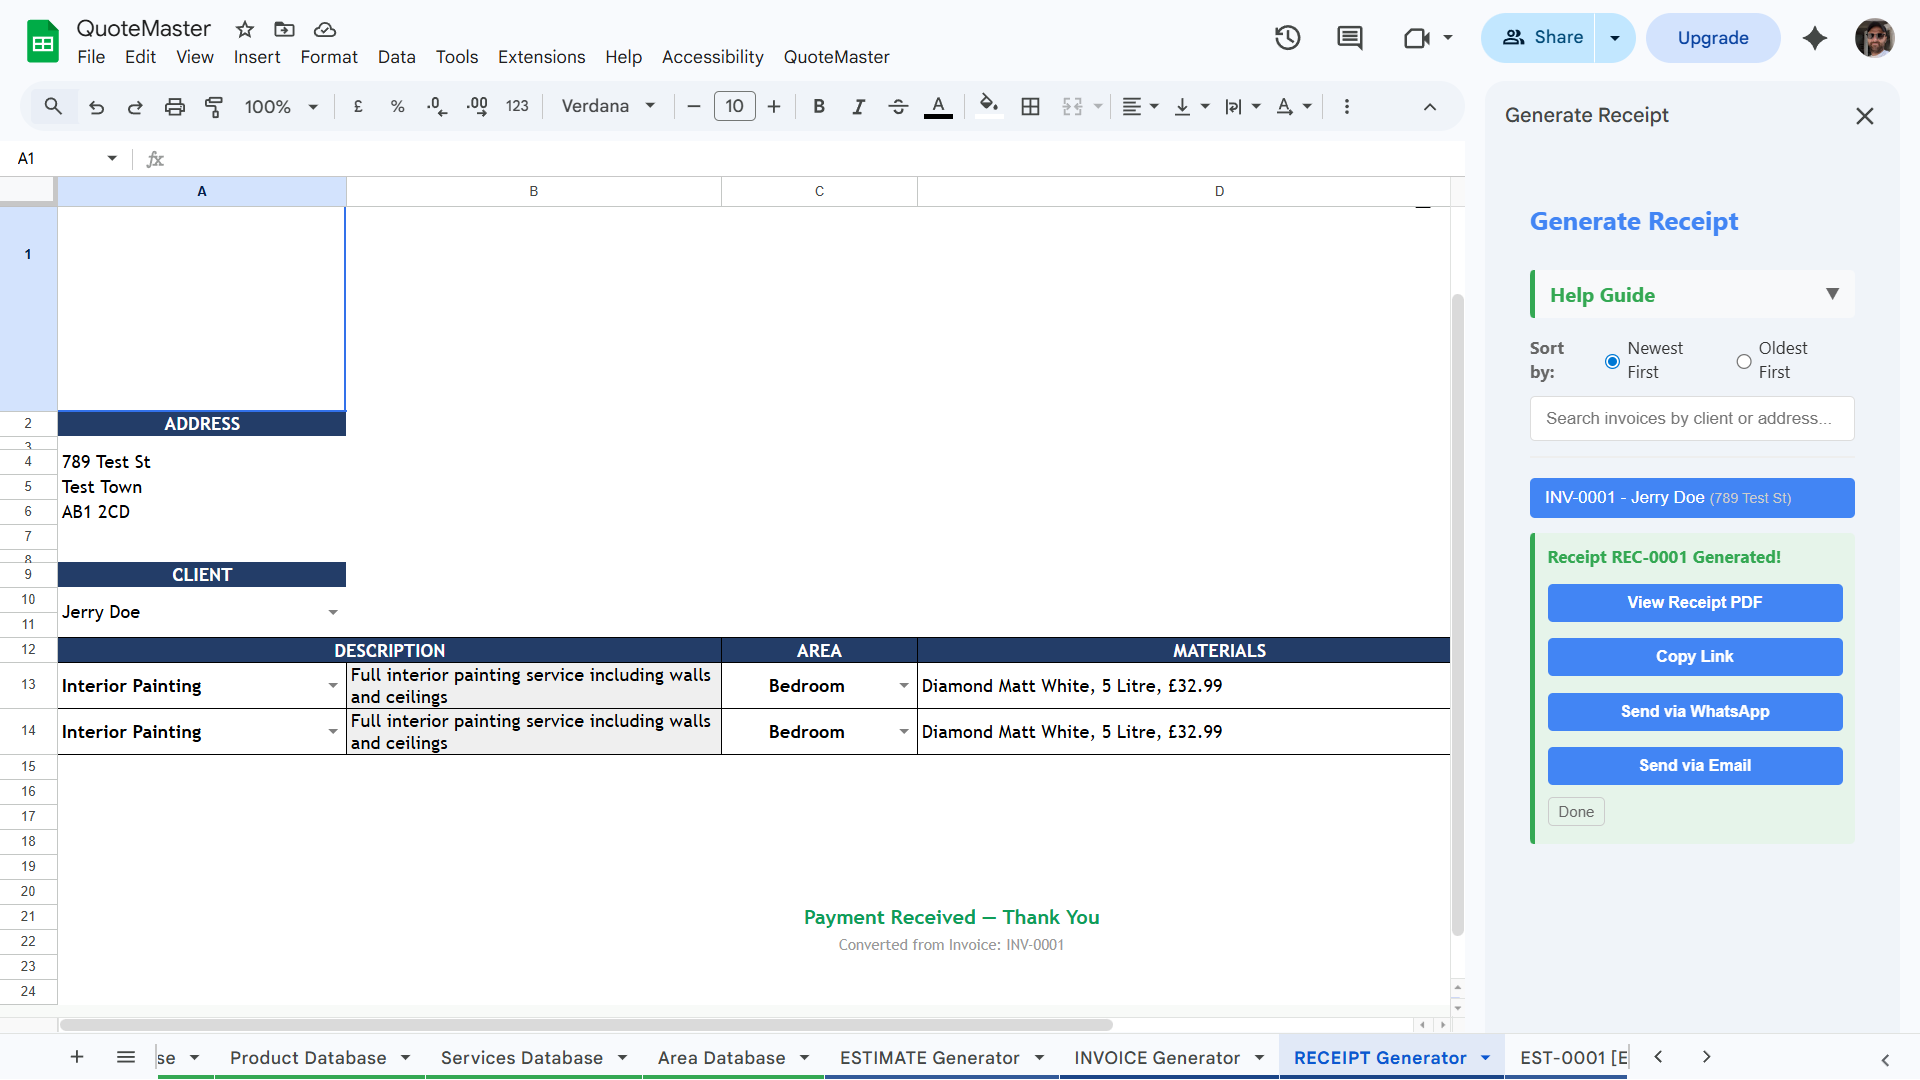
The Receipts generator works just like the Invoice Generator, except instead of selecting an estimate to convert, you pick a completed invoice to turn into a receipt. Once generated, you have the same send options to get it straight to your client. Client statuses in the database also update automatically throughout this whole process, so you always know exactly where each job stands without having to manually keep track of anything.
11. Quick Send
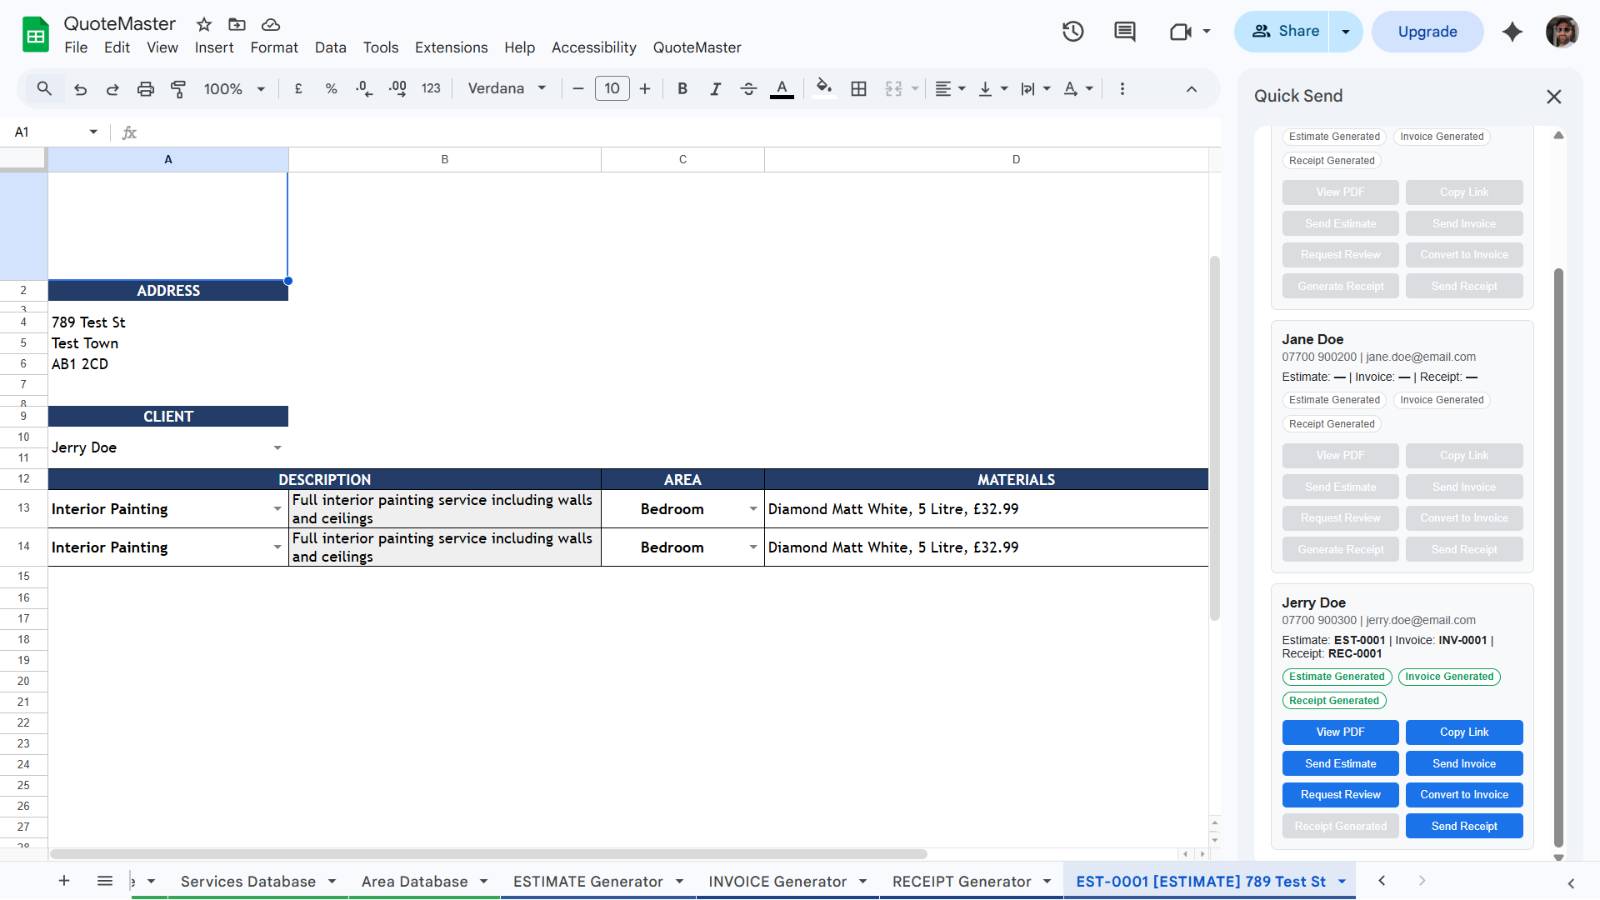
Need to chase up a client or resend a document? Quick Send is always there. Select any client and send their latest estimate, invoice, or receipt straight to them via WhatsApp or email without having to go back through the generators. A handy shortcut for keeping on top of all your clients in one place.
12. Revenue Dashboard
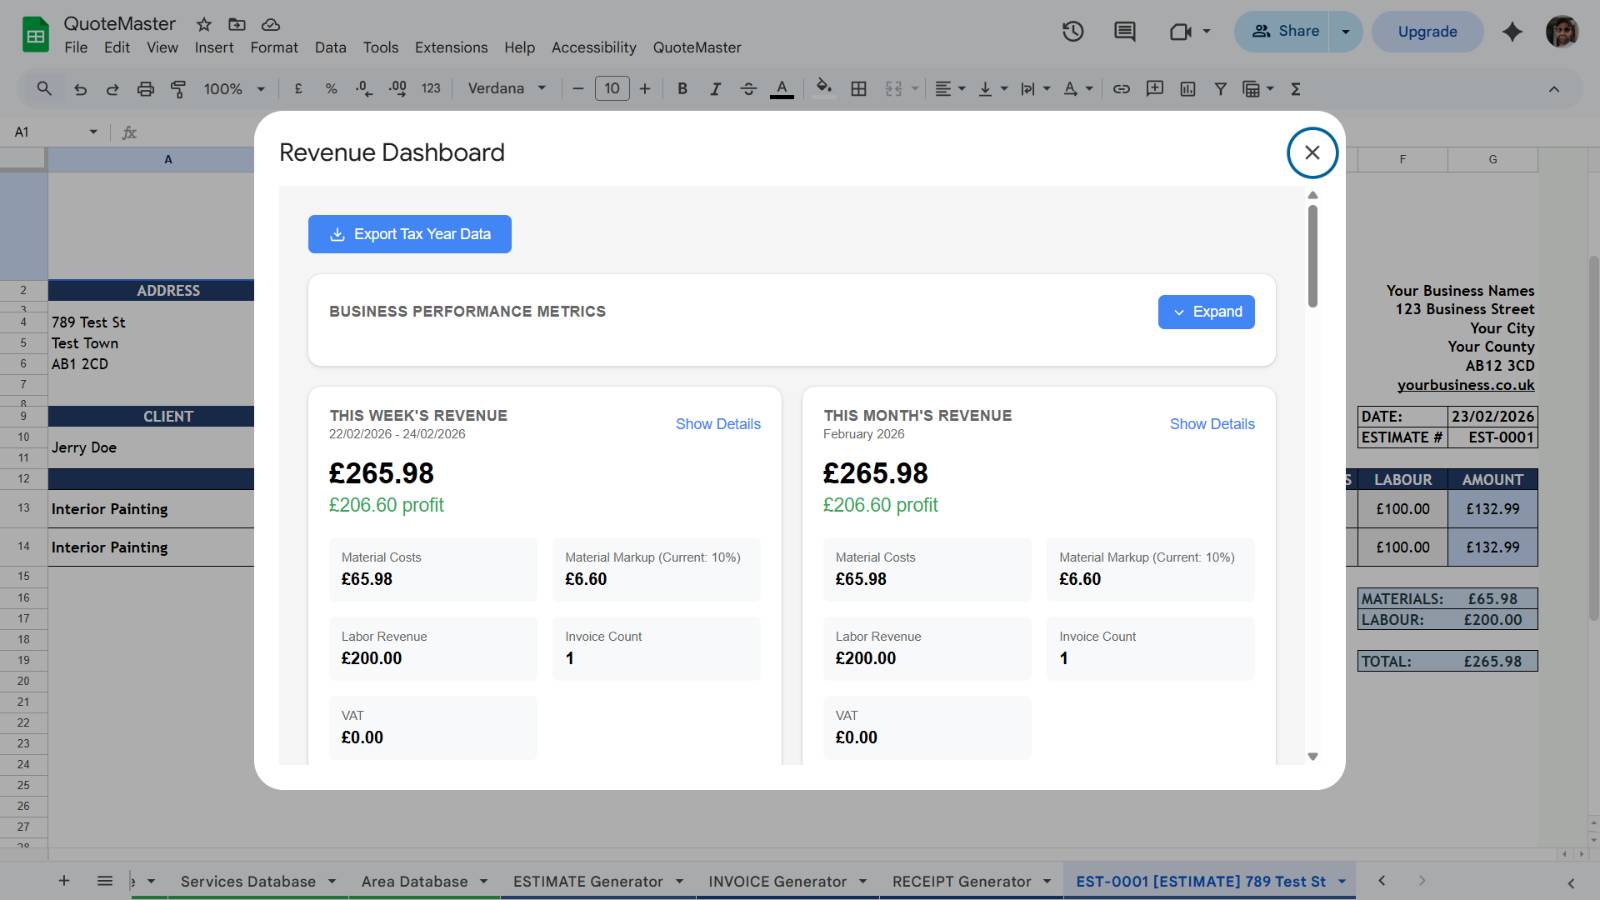
The Revenue Dashboard gives you a real-time picture of exactly how your business is performing. See your total revenue, outstanding invoices, average job value, and profit margins at a glance, broken down by week, month, year, and all time. You can also drill down by client to see who your most valuable customers are, which makes it easy to spot where your best work is coming from and focus your energy accordingly. VAT is calculated and broken out separately, making it straightforward to report to your accountant without any manual number crunching. If you adjust your material markup in the Settings tab, the dashboard accounts for that automatically so your profit figures are always accurate. Beyond the day-to-day, revenue trends and projections give you a longer view of your business so you can spot patterns, understand your busiest periods, and make informed decisions about where to take things next. Everything updates automatically as you work, no spreadsheet wrangling required.
Frequently Asked Questions
Do I need a Google Workspace™ account to use QuoteMaster?
No, a regular Google™ account is all you need. QuoteMaster is a Google Sheets™ add-on with extended functionality across Google Calendar™, WhatsApp, and your preferred email client. No paid Google subscription required.
Does QuoteMaster work on any computer?
QuoteMaster runs entirely in your browser via Google Sheets™, so it works on any desktop or laptop (Windows, Mac, or Chromebook) as long as you have an internet connection. No software installation is needed beyond installing the add-on from the Marketplace.
Is my data secure?
All your data is stored in your own Google Drive™ and is subject to Google's security protocols. QuoteMaster never stores your business data on external servers. It stays entirely within your Google account.
Does QuoteMaster handle VAT?
Yes. Set your VAT rate in the Settings tab and QuoteMaster will apply it automatically to your estimates and invoices. VAT totals are also broken out clearly in the Revenue Dashboard, making it straightforward to report to your accountant.
Can I import my existing client or product data?
Yes. Each database (clients, services, products, and areas) has a Bulk Import feature. Paste in data from an existing spreadsheet or CSV and it loads in seconds. This makes switching from Excel or another system quick and painless.
What happens to my data if I cancel my subscription?
Your data stays in your own Google Drive™ and belongs entirely to you. Cancelling your QuoteMaster subscription does not delete anything. Your spreadsheet and all records remain accessible. You simply lose access to the QuoteMaster add-on features.
What if I accidentally delete a sheet?
You can regenerate all QuoteMaster sheets at any time using Sheet Installer in the Settings tab. This restores all the required tabs and structure instantly. For extra peace of mind, Google Drive's™ built-in version history also lets you roll back to any previous state.
Still have questions?
Browse the FAQ for answers to the most common questions, or get in touch and I'll help you out.
Browse the FAQ